The Cars & Concepts T-top setup really looks like a
targa roof. The roof was cut completely apart at the A and B pillars. A center
reinforcement was added, but it was inside the glass when the tops were in. This
is pretty similar to some Corvette tops and several later GM designs. The tops
themselves have a single lock handle (like a Fisher top) and no frame around the
glass. Side beam apparently came in two colors.
 |
| I have seen several cars with these tops and the usual story is
that they were dealer installed. Cars and Concepts probably had a network of
installers, but, like Hurst, they also worked closely with auto manufacturers on
new car conversions. Ironically, one of their jobs was making Hurst Oldsmobiles.
Believe it or not, you can still get some parts at
sunroofdoctor.com. Also,
the photo at right comes from Mr
Trans Ams, so apparently they had at least one parts car with these tops in
it. |
 |
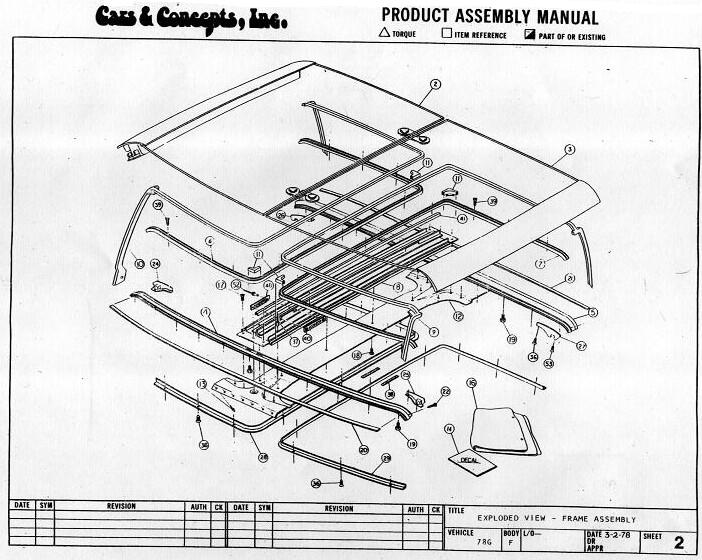
| Jamie Lee was nice enough to scan for us the exploded diagram of C and C tops. Thanks!
 |
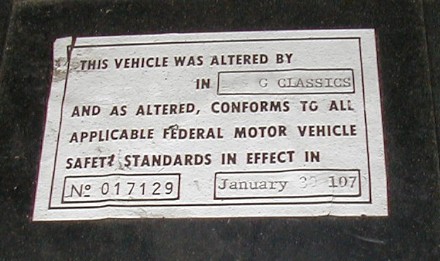
| We recently dismantled a 1979 Camaro with C and C tops
to see what we could learn. This car, which we call "G", had its tops installed
on January 30th, 1979 by "G Classics" as evidenced by the glove box decal. Hurst
used a similar decal to claim safety compliance. I have never heard of G
Classics, but from the name we can surmise it wasn't a Pontiac dealer. The car
was built around December 20th, so it was brand new. |
 |
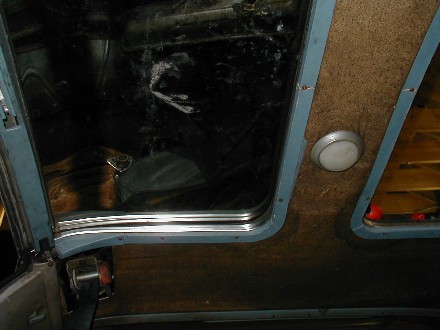
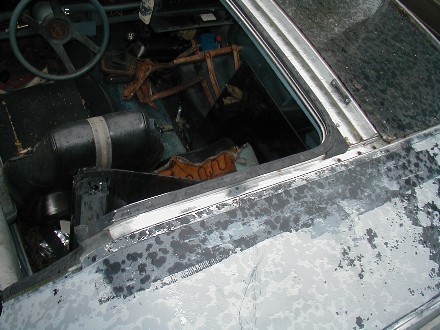
| This interior view shows that the opening size was similar to
the Fisher factory tops. The molding is also similar, consisting of a u-shaped
channel and trim pieces on each end. The headliner upholstery is gone, showing
the original headliner board underneath.
This view also shows that C and C interior trim was painted to match the
interior color. This car originally had light blue interior. |
 |
| This outside view shows the general layout of the C and C setup.
There are aluminum rails clamped to the roof in front and back. These are
"bridged" by an aluminum spine with a heavy steel brace hidden underneath. The
spine had slots for the t-tops to hook in along the center of the car.
Weatherstripping was in a separate aluminum channel which was screwed to the 3
main aluminum roof pieces with lots of sealant. There is a LOT of room for rain
to run off in this design. The weatherstripping is high and dry above the
channels where water would drain. |
 |
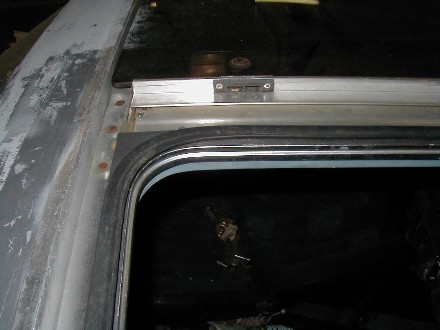
| Here's a view of the front joint in the aluminum roof frame. The
passenger's side t-top is still installed. The black plastic triangle is used to
take up space in the corner where the weatherstrip channel curved around.
Any water running off the t-tops or weatherstripping would run into the flat
aluminum channels, so the plastic triangle overhangs aluminum ribs next to the
weatherstrip. See the next photo for a better view of this on the far side. |
 |
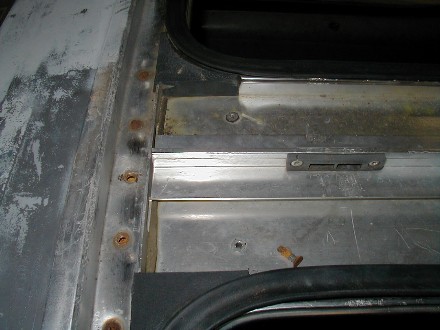
| Here's a closer view of the same joint with both t-tops off.
Some things to notice in this picture are the bead of caulk at the joint, 5
screws across the joint, and two screws further back. All these pieces had to be
heavily caulked. When it rained, all the water would be running across the
aluminum where these screws are.
There is a vertical stiffening rib on the front aluminum piece, and there are
slots in it here to allow rain to run through it. You can barely see the slots
from this angle, just above the gray bead of caulk. |
 |
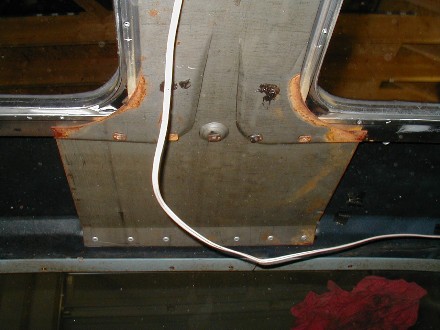
| Here's an inside view toward the rear of the car, showing the
steel brace. Fastener layout is identical on either end. Notice the 6 rivets
connecting the brace to the inner roof panel, the 5 screws (seen here as square
welded-on speed nuts) directly at the joint between roof and spine, and the two
black dots of sealer, which shows where those other two screws are going. This
is a very strong structure and it is well connected together. |
 |
| The weatherstripping fit and structure of the channels appears
much better than the Hurst tops. Here, for example, we see the rear corner of
the glass. The roof has been cut about even with the window opening. The
original GM weatherstripping channel is used on the vertical window opening, and
the corner piece, while visible here, has been cut almost completely away.
This area of weatherstripping needs to be glued down and sealed thoroughly to
make the water, flowing on the aluminum, go over it. The weatherstripping is
nicely shaped to catch the top of the glass. |
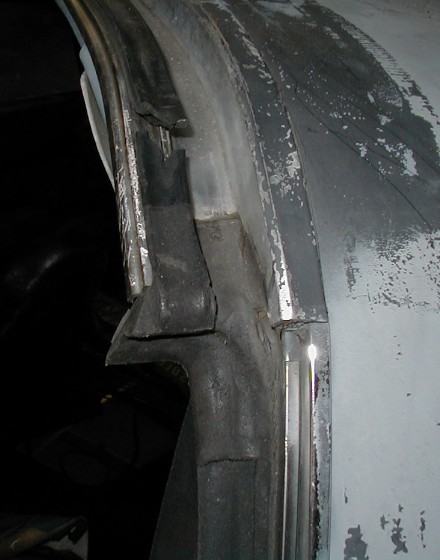 |
| Once the weatherstripping is removed, you can see where the
weatherstrip jumps from original GM channel to the C and C channel. The
weatherstripping is somewhat unsupported in this spot, but it's tiny compared to
the same transition on the Hurst Hatch. |
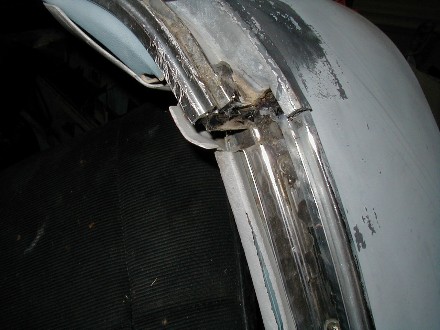 |
The front corner is much more impressive. Here, the
original GM channel has been removed so you can see the quality of fit between
the structural pieces. The C and C channel is still there. The GM channel was
trimmed with tin snips to fit the exact dimensions of the a-pillar as cut off.
If you can't tell, this is the front of the hatch opening on the driver's side.
The front end of the steel brace, with all its hardware, is shown in the
background. 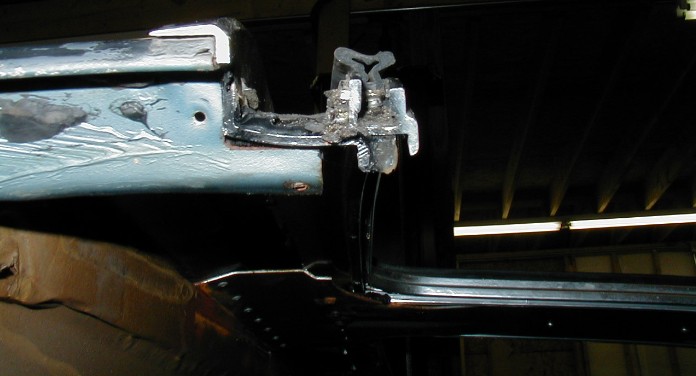 |
| When the weatherstrip channels are removed, the joint in the
main aluminum pieces is visible. The aluminum pieces overlap about 2" here so
that the 5 screws can sandwich everything together. Notice (especially on the
far side) that both pieces have a vertical aluminum rib that meets are right
angles.It forms a dam that keeps water outside the car, so this joint needs to
be caulked. The weatherstripping channel was mounted just beside this vertical
rib. |
 |
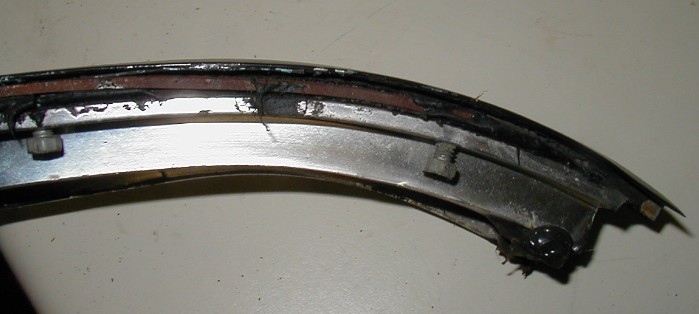
Below is the end of the rear rail after I removed it
from the car. It is fairly simple, with clamping screws all the way across and a
steel (rusty) bar that was sandwiched between the inner and outer roof panels.
This would have stiffened the whole roof structure considerably, and in fact the
Hurst tops also had a bar that was sandwiched between panels. It's crude, but it
really works. We've bought 40 junk Trans Ams, and we have never seen a
Hurst-prepped roof that was caved in. However, all the Fisher t-top roofs we
have (about 20 cars) suck in spontaneously just behind the t-tops.
 |
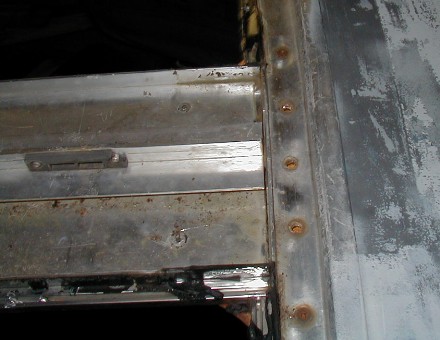
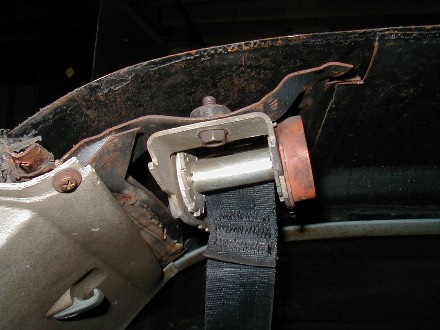
| In the rear, inner and outer panels were cut evenly with each
other and the bar sandwiched in between. The rear aluminum rail was clamped to
both panels. On the far right of the picture you can see where the panels are
closely aligned.
At the seat belt reel, the panels weren't parallel, so the inner panel was
cut back out of the way. I wouldn't feel too safe wearing this seat belt, but in
the 70's nobody wore them anyway. |
 |
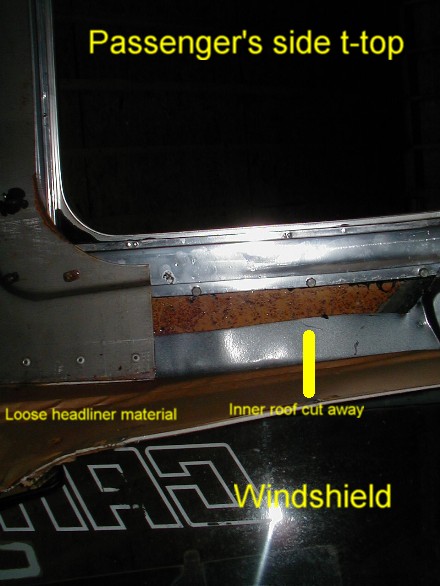
| In the front, the inner roof was cut back until only about 2"
was left. This was rivited to the center brace which is visible here. The front
aluminum rail was clamped to the outer roof panel only, which has its rusty
underside visible here. The clamping bolts are clearly visible along the front
rail. Like on the Hurst cars, they just barely left enough material to mount the
sunvisor, and that area is just coming into view on the far right of the
picture.
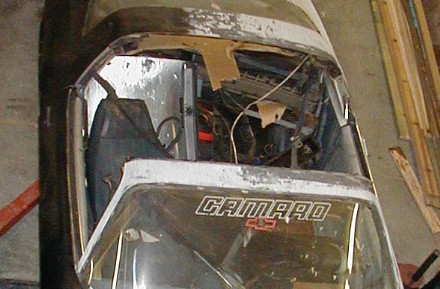
It may be hard to tell what you're looking at in this photo. This photo is
inside the car, looking up at the roof on the passenger's side front. The
reverse word "Camaro" is at the top of the windshield. The complete setup,
including weatherstripping and t-top, is in the car. I have pulled away the
headliner but it's just flopping loose and messes up the picture. |
 |
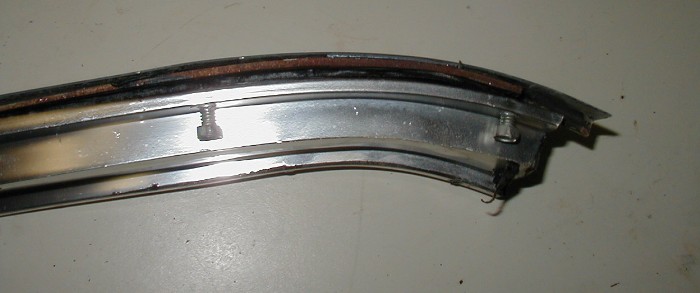
Below is a view of the front rail. Construction is
almost identical to the rear rail. It also contains the reinforcing bar, but
based on the picture above, it wasn't sandwiched between the roof panels like
the rear one. It had to be used only to spread the force of the clamping screws.
 |
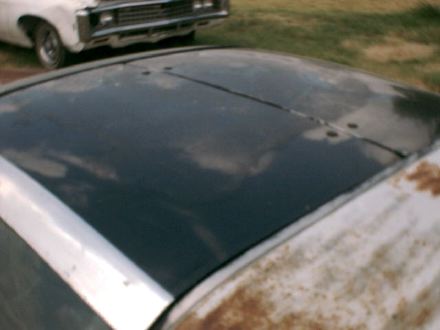
| Here's a bird's eye view of the car with the tops totally
removed. The only interesting thing visible in this photo is that the rear cut
forms a straight line with the rear of the window opening (B-pillar).
Well, I suppose it's also intersting that the roof was totally cut off. In
case you didn't believe it, here's proof. |
 |